Listen to this AI-generated podcast summarizing the article content for easier digestion
Introduction
Are you wasting time with AI coding assistance? If you're using CursorAI, Windsurf, or VS Code, you might be facing a common frustration: AI doesn't understand your project's specific requirements, best practices, or file structure. This leads to incorrect code suggestions and inconsistent coding styles.
Here's the reality: 90% of developers aren't getting the most out of their AI coding tools. But there's a solution that can reduce errors and hallucinations by over 90% while saving you significant time on prompting.
I'll show you three powerful documentation tricks that will transform how you work with CursorAI. These methods will help you provide perfect context to your AI assistant every time, resulting in cleaner code and faster development.
Leveraging the @ Key for Quick Documentation
The first method is surprisingly simple but incredibly powerful: using the @ key in CursorAI. Here's how it works:
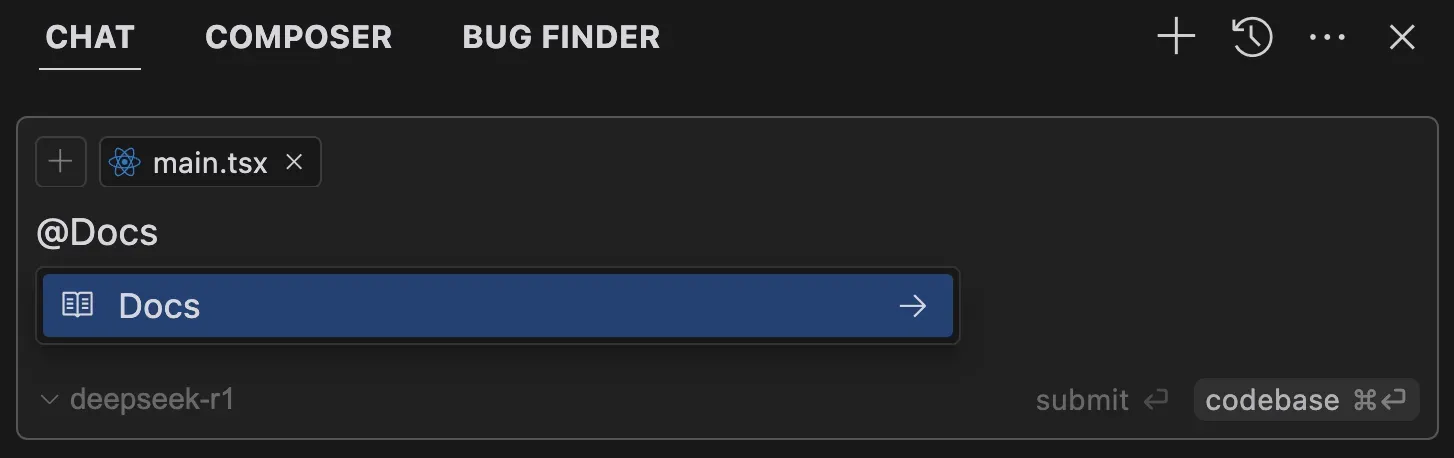
Adding Public Documentation
In Cursor, type @docs to search for public documentation
You can attach documentation from popular libraries like OpenAI or Beautiful Soup
If you can't find specific documentation, add a public website link
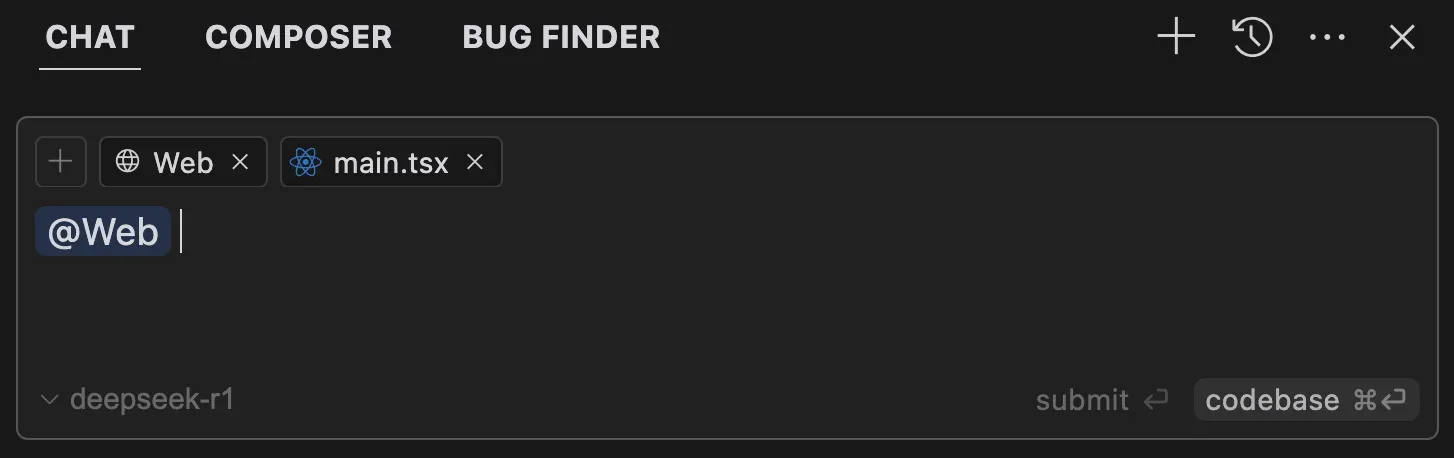
Web Integration
Type @web to use the web search tool
For existing projects, use @codebase to include all your files as context
This method works great for quick documentation needs, but it's just the beginning. The real power comes from creating project-specific documentation, which we'll explore in the next section.
Pro Tip: When working with public documentation, make sure to pick the most relevant sections for your project. You don't need to include everything - focus on the parts that align with your current development needs.
Creating Custom Project Rules
The key to maximizing AI coding assistance lies in creating your own project documentation. While you can add this documentation at any point, it's ideal to set it up before starting your project. One powerful feature available in CursorAI (and also in WindSurf and VS Code) is the ability to specify rule files.
Here's how to set up custom rules in CursorAI:
Creating a New Rule File
Press Command + Shift + P
Select "New Cursor Rule"
Choose a name for your rule (e.g., "frontend-rules" or "backend-rules")
Defining Rule Scope
{ "description": "Frontend TypeScript rules", "pattern": "frontend/**/*.{ts,tsx}" } This example applies rules to all TypeScript files within the frontend folder and its subfolders.
Search for framework-specific examples (like Next.js)
Copy and modify rules to match your project needs
Example rule structure for Next.js frontend:
You are a Senior Front-End Developer and an Expert in ReactJS, NextJS, JavaScript, TypeScript, HTML, CSS and modern UI/UX frameworks (e.g., TailwindCSS, Shadcn, Radix). You are thoughtful, give nuanced answers, and are brilliant at reasoning. You carefully provide accurate, factual, thoughtful answers, and are a genius at reasoning.
- Follow the user’s requirements carefully & to the letter.- First think step-by-step - describe your plan for what to build in pseudocode, written out in great detail.- Confirm, then write code!- Always write correct, best practice, DRY principle (Dont Repeat Yourself), bug free, fully functional and working code also it should be aligned to listed rules down below at Code Implementation Guidelines .- Focus on easy and readability code, over being performant.- Fully implement all requested functionality.- Leave NO todo’s, placeholders or missing pieces.- Ensure code is complete! Verify thoroughly finalised.- Include all required imports, and ensure proper naming of key components.- Be concise Minimize any other prose.- If you think there might not be a correct answer, you say so.- If you do not know the answer, say so, instead of guessing.
### Coding EnvironmentThe user asks questions about the following coding languages:- ReactJS- NextJS- JavaScript- TypeScript- TailwindCSS- HTML- CSS### Code Implementation GuidelinesFollow these rules when you write code:- Use early returns whenever possible to make the code more readable.- Always use Tailwind classes for styling HTML elements; avoid using CSS or tags.- Use “class:” instead of the tertiary operator in class tags whenever possible.- Use descriptive variable and function/const names. Also, event functions should be named with a “handle” prefix, like “handleClick” for onClick and “handleKeyDown” for onKeyDown.- Implement accessibility features on elements. For example, a tag should have a tabindex=“0”, aria-label, on:click, and on:keydown, and similar attributes.- Use consts instead of functions, for example, “const toggle = () =>”. Also, define a type if possible.
The beauty of rule files is that they're applied automatically every time you make changes to matching files. You can create multiple rule files - for example, separate ones for frontend and backend code.
Pro Tip: Keep your rules specific and well-documented. It's better to have multiple focused rule files than one massive configuration that's hard to maintain.
Building a Comprehensive Documentation Folder
The most powerful way to improve AI code suggestions is creating a dedicated documentation structure. Here's how to build it:
Setting Up the Documentation Folder
Create a new folder called documentation
Start with a README.md as your documentation index
Create separate markdown files for different aspects of your project
Essential Documentation Files
Software requirements document
Technical stack overview
System architecture
Frontend guidelines
Backend structure
File structure
App flow
Development setup
Deployment guide
Testing strategy
API documentation
System prompts
Data processing guidelines
Remember, you don't need to create all these documents at once. Start with the most crucial ones for your current development phase and add more as your project grows.
Using LLMs to Generate Documentation
One of the most efficient ways to create documentation is by leveraging Large Language Models. Here's a powerful workflow:
Choosing Your LLM
In Cursor, use O3 mini for its high output limit (100,000 tokens). To access different models:
Go to Cursor settings
Navigate to the Models tab
Activate/deactivate desired models
Creating Documentation with AI
Here's a proven prompt template:
Act as a senior software architect specialized in technical writing. Your task: Craft documentation for a software project. Follow technical writing style.
Present output as markdown.
Documentation structure:
- Overview
- Purpose
- Detailed content
- Related documents
- References
- Change log
- Visual elements (Mermaid diagrams)
Project details: [Add your project specifics here]
AI can understand and generate these diagrams for cleaner code
Example Mermaid diagram:
1flowchart TD
2 A["User Upload"]--> B["Audio Chunking"]
3 B --> C{"Whisper Transcription"}
4 C --> D["Speaker Identification"]
5 D --> E["Prompt Engineering Layer"]
6 E --> F{"GPT-4 Summary"}
7 F --> G["Redaction Module"]
8 G --> H["User Dashboard"]
9 C --> n1["Untitled Node"]
Integrating Documentation with Cursor
The magic happens when you connect your documentation with your coding environment:
Adding Documentation Context
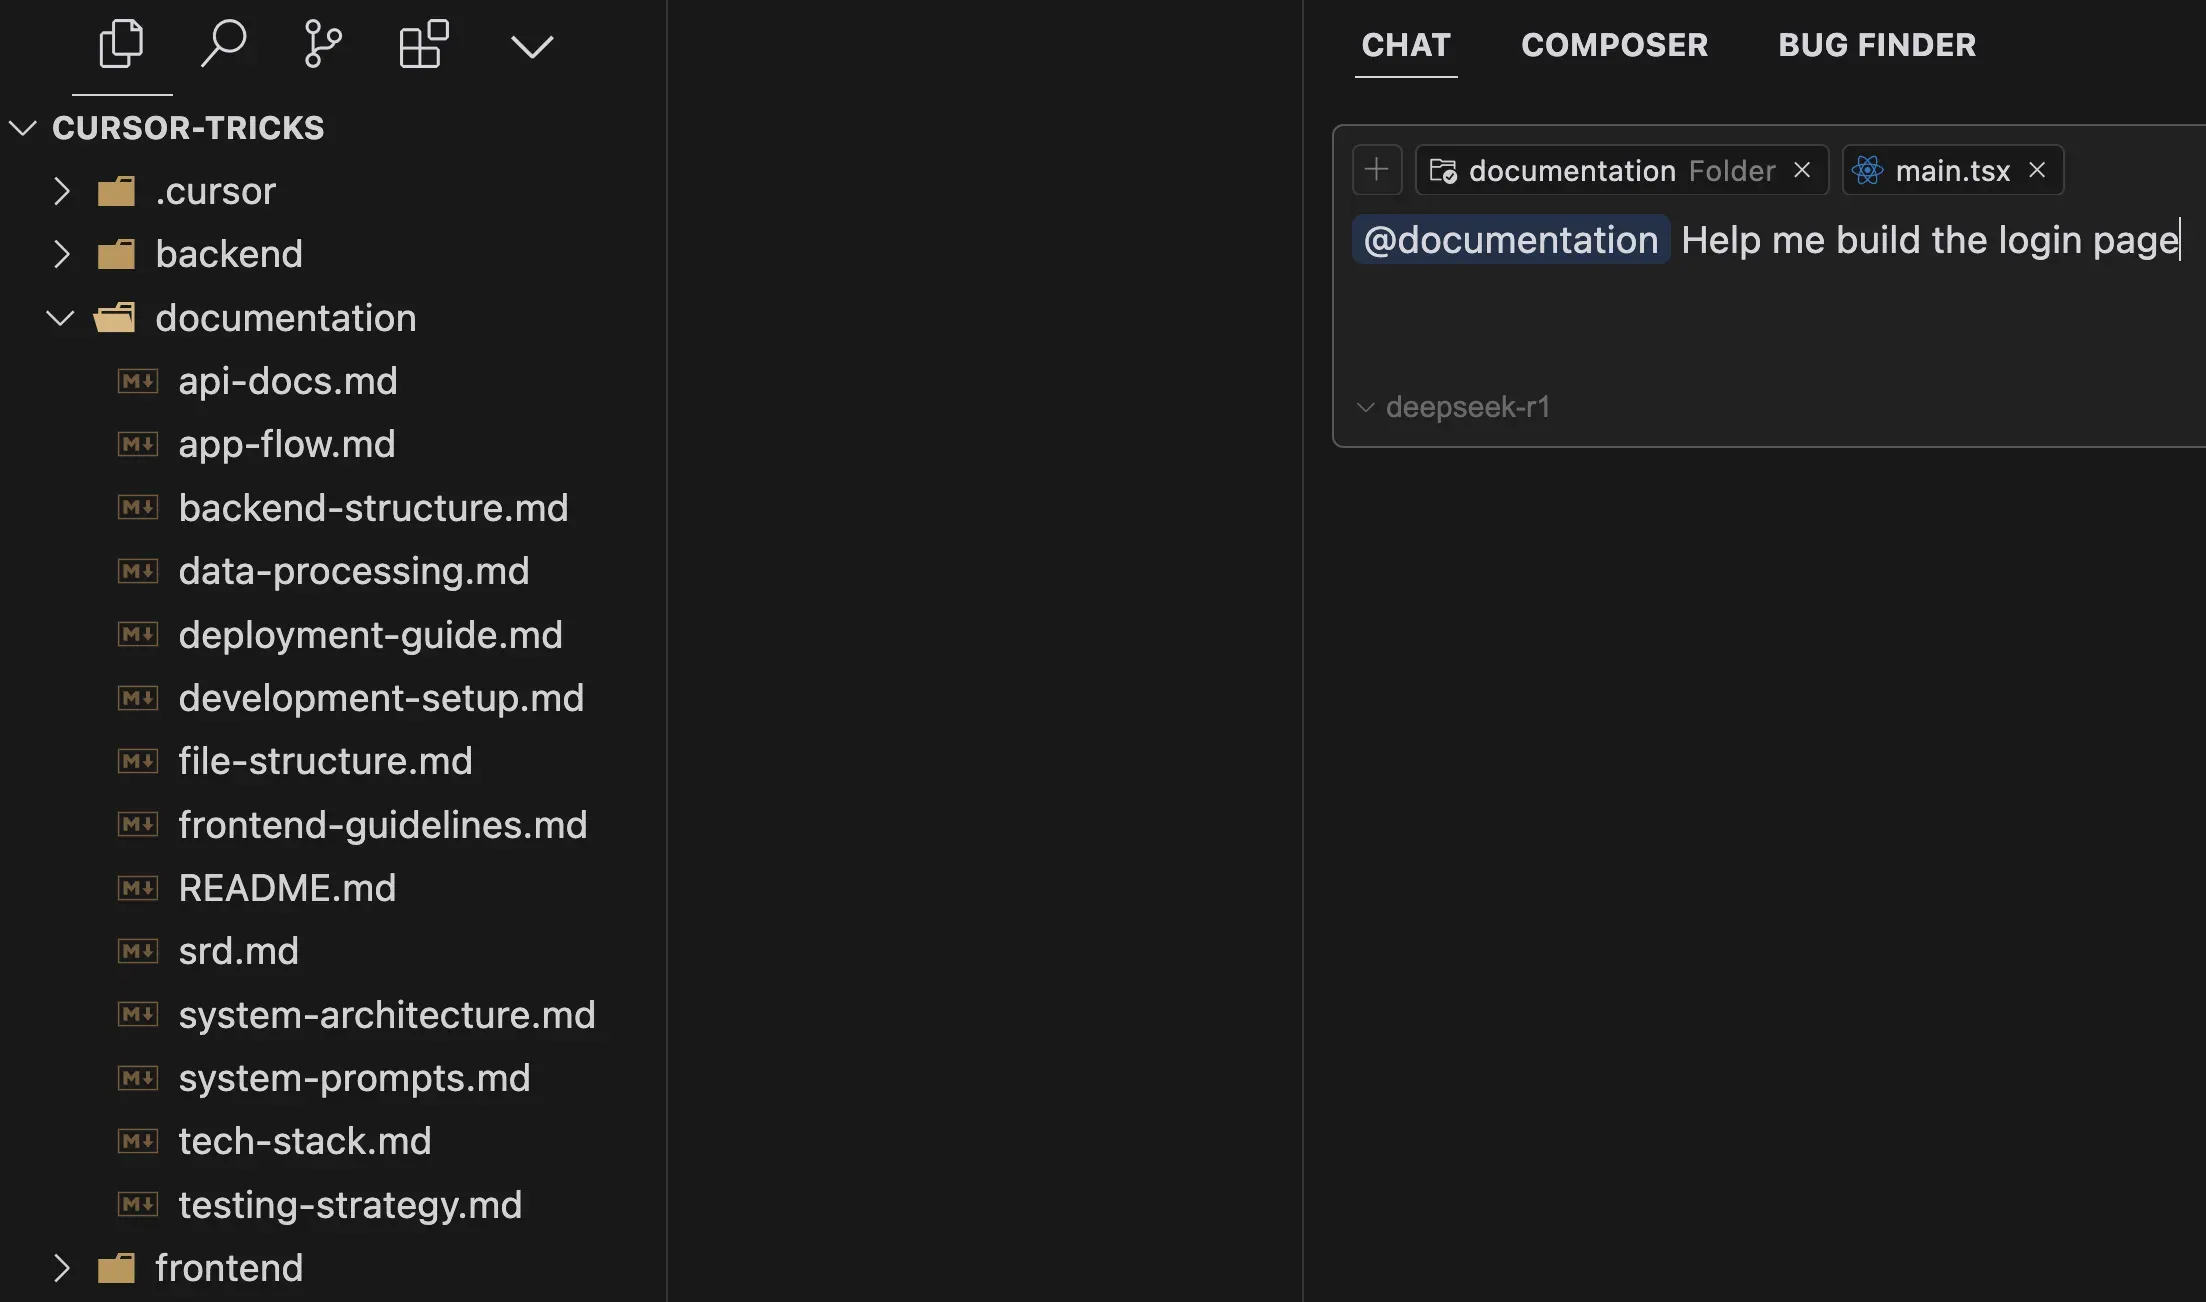
@documentation This simple command adds your entire documentation folder as context.
Using Enhanced Context
Now you can make simple requests like "help me build user authentication"
The AI will reference your documentation automatically
Results will align with your project's architecture and requirements
Utilizing Notepads for Context
The third method involves Cursor's notepad feature, which offers unique advantages for managing context:
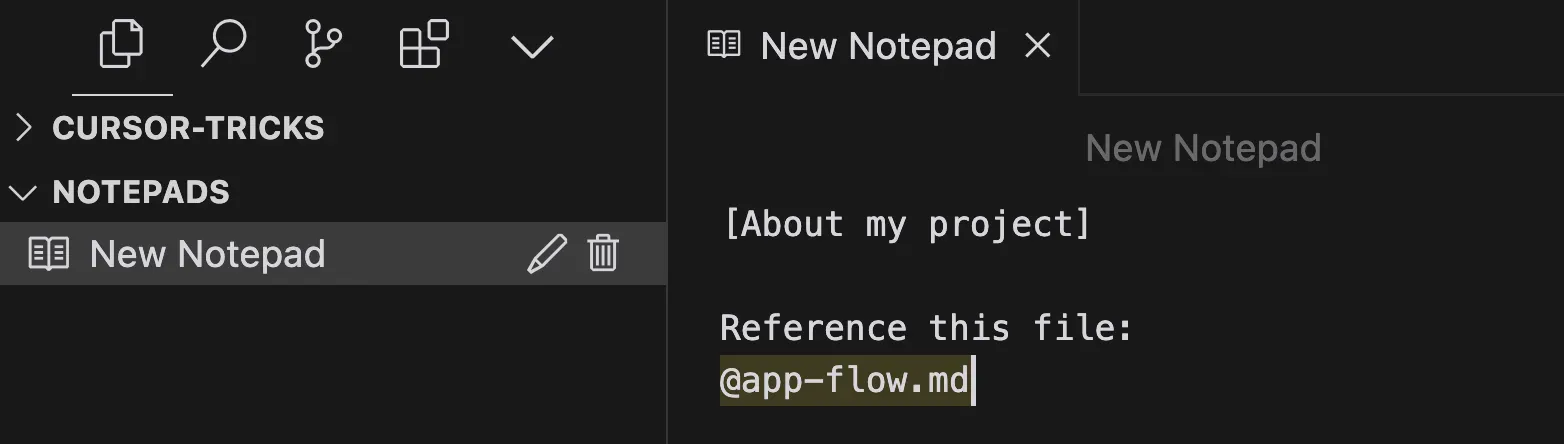
Creating and Using Notepads
Click the notepad tab
Create a new notepad
Add content and reference existing files
Key Features
Similar to markdown files but with file referencing capabilities
Can reference specific sections of your codebase
Easy to add as context in chat window
Limitations
Not easily version-controlled with Git
Less suitable for team collaboration compared to documentation folders
Pro Tip: Use notepads for personal notes and quick references, but prefer the documentation folder method for team projects.
Conclusion
By implementing these three documentation methods - @ key integration, custom rules, and comprehensive documentation folders - you'll see dramatic improvements in your AI-assisted coding:
90%+ reduction in AI coding errors
Significantly faster development time
More consistent code quality
Better alignment with project requirements
Remember these key takeaways:
Start with public documentation using the @ key for quick wins
Create custom rules to enforce coding standards automatically
Build comprehensive project documentation for the best results
Use notepads for personal reference when needed
The secret to efficient AI coding isn't just about having the right tools - it's about giving them the right context. Keep your documentation simple, easy to maintain, and well-organized. The time you invest in documentation will pay off many times over through cleaner code and faster development cycles.
Download a free summary with the prompts here: Google Doc
Continuous Improvement
Execution-Focused Guides
Practical frameworks for process optimization: From workflow automation to predictive analytics. Learn how peer organizations achieve efficiency gains through ROI-focused tech adoption.